

Click edit button to change this text. Lorem ipsum dolor sit amet, consectetur adipiscing elit. Ut elit tellus, luctus nec ullamcorper mattis, dapibus.

Click edit button to change this text. Lorem ipsum dolor, consectetur adipiscing. Ut elit tellus, luctus nec ullamcorper mattis, pulvinar dapibus leo.

Click edit button to change this text. Lorem ipsum dolor sit amet, consectetur adipiscing elit. Ut elit tellus, luctus nec ullamcorper mattis, pulvileo.


Walls and ceilings are among the most visible features inside any property, and their condition can strongly influence how clean, modern, and comfortable a space feels. Even beautifully designed interiors can lose their appeal when surfaces appear uneven, cracked, rough, or poorly finished.
This is why smooth plaster finishes continue to play an essential role in both residential and commercial construction projects. Among the many plastering techniques used today, skimming plaster services have become especially popular because they create sleek, polished, and visually refined surfaces that improve the overall appearance of interior spaces.
Skimming plaster involves applying a thin finishing layer of plaster over existing walls or ceilings to create a smooth and even surface ready for painting or decorating. This process is commonly used to refresh damaged walls, cover imperfections, modernise older interiors, or improve the finish quality of plasterboard systems.
Unlike full plastering, which may involve multiple coats and structural surfacing work, skimming mainly focuses on refining and smoothing the final visible layer.
One of the most common questions homeowners ask during renovation or repair projects is: What is the difference between skimming and plastering? Although the two terms are closely related, they refer to different plastering methods.
Plastering generally refers to the broader process of applying plaster to walls or ceilings, often involving base coats, structural layers, and full surface construction.
Skimming, on the other hand, specifically refers to applying a thin topcoat or finishing layer of plaster over an existing surface to create a smooth appearance. In simple terms, skimming is often considered a finishing technique within the larger plastering process.
Skimming plaster services have become increasingly common in modern renovations because they offer an efficient and cost-effective way to improve interior surfaces without requiring complete wall replacement.
Whether refreshing old plaster walls, repairing damaged plasterboard, covering textured ceilings, or modernising outdated finishes, skimming provides a cleaner and more contemporary appearance while improving paint quality and overall interior presentation.
Professional skimming also improves surface durability and consistency. Smooth walls reflect lighting more evenly, enhance decorative finishes, and create interiors that feel brighter and more polished. In both homes and commercial spaces, skimming helps create the seamless wall and ceiling finishes that modern architecture increasingly demands.
This article explores Skimming Plaster Services in detail, explains the difference between skimming and plastering, discusses the techniques and materials involved, and highlights the many practical and visual benefits skimming provides for modern interior spaces.

Modern interior design strongly emphasises clean lines, seamless surfaces, and refined architectural presentation. Smooth walls and ceilings create a more polished environment that allows furniture, lighting, artwork, and decorative features to stand out without distraction.
Uneven surfaces, visible joints, dents, cracks, and rough textures can reduce the visual quality of a room even when other design elements are carefully selected. Skimming helps eliminate these imperfections by creating consistent and level finishes that improve the appearance of painted and decorated surfaces.
Smooth walls also improve lighting performance within interiors. Even surfaces reflect both natural and artificial light more effectively, making rooms appear brighter and more spacious. This is especially important in modern homes where open-plan layouts and minimalist aesthetics rely heavily on visual simplicity.
Another reason skimming has become popular is efficiency. Rather than removing and replacing entire wall systems, skimming allows plasterers to refresh and modernise surfaces using relatively thin finishing layers. This often reduces renovation time, labour costs, and construction disruption.
As modern architecture increasingly prioritises seamless finishes, skimming plaster services continue to become one of the most widely requested interior finishing solutions.
Skimming focuses on creating smooth and refined surface finishes.
Skimming uses a thin plaster layer over existing surfaces.
The process improves visual consistency and smoothness.
Smooth finishes improve decorating quality significantly.
Skimming supports contemporary minimalist design styles.
Although related, skimming and plastering are not identical processes.
Plastering often involves multiple structural layers.
Skimming mainly improves the final visible surface.
Traditional plastering may involve wall formation and reinforcement.
Skimming prepares surfaces for paint and decoration.
Skimming is widely used in both renovations and new construction.
Skimming modernises outdated wall finishes effectively.
Minor imperfections can often be concealed successfully.
Plasterboard requires smooth finishing for decoration.
Skimming improves the appearance of ageing ceilings.
Older walls often benefit from skimming during renovations.
Thin coats help improve surface consistency.
Skimming creates smoother contemporary finishes.
Smooth walls support cleaner decorative results.
Refreshed surfaces improve durability and maintenance.
Modern plasterboard systems frequently require skim finishes.
Skimming creates seamless wall surfaces.
Proper finishing eliminates visible board edges.
Smooth walls improve overall visual presentation.
Minimalist spaces depend on flawless surface finishes.
Ceilings strongly influence room appearance and lighting quality.
Skimming hides cracks and uneven textures effectively.
Textured ceilings can be transformed into smooth surfaces.
Smooth ceilings distribute light more evenly.
Minor stains and repairs may be concealed after restoration.
Preparation is essential for long-lasting skim finishes.
Dust and loose material reduce plaster adhesion.
Weak areas should be stabilised before skimming begins.
Certain surfaces require additional adhesion support.
Floors and fixtures should remain protected during work.
Professional skimming involves several careful stages.
Proper consistency improves application quality.
Initial coats create basic surface coverage.
Trowelling techniques improve finish consistency.
Multiple thin layers improve surface quality significantly.
Smooth finishes require careful final trowelling.
Different projects may require different plaster products.
Gypsum remains one of the most common skim materials.
Specialised compounds support drywall finishing.
Preparation materials improve plaster performance.
Certain products reduce cracking risks later.
Different wall conditions require different solutions.
Minor cosmetic imperfections often suit skimming.
Severely damaged walls may require deeper restoration.
Skimming is often more affordable than full replastering.
Skimming generally requires less construction work.
Professional skimming improves both appearance and durability.
Skilled plasterers create highly refined finishes.
Smooth walls improve the final decorating quality.
Skimming refreshes rooms without major demolition.
Well-finished interiors improve visual appeal significantly.
Low-quality skimming can affect long-term appearance.
Poor finishing leaves uneven surface textures.
Incorrect plaster application may cause cracking.
Improper preparation reduces durability significantly.
Poor levelling affects lighting and visual consistency.
Smooth surfaces improve decorative flexibility.
Even surfaces support cleaner paint application.
Smooth walls improve wallpaper adhesion and appearance.
Refined finishes support modern interior styles.
Smooth walls suit contemporary spaces effectively.
Renovations frequently involve skim plastering work.
Skimming modernises outdated interiors effectively.
Renovations often leave minor wall imperfections.
Ceiling skimming refreshes ageing surfaces quickly.
Smooth finishes complement modern layouts successfully.
Commercial interiors also rely heavily on smooth wall finishes.
Professional surfaces improve workplace presentation.
Smooth finishes support customer-facing environments.
Large developments often require extensive skim finishing.
Clean surfaces support hygiene and maintenance standards.
Experienced plasterers achieve significantly better results.
Preparation strongly affects skim durability and appearance.
Smooth finishes require technical skill and precision.
Different surfaces require different skim approaches.
Professional coordination improves renovation efficiency.
Several factors influence project pricing.
Larger surfaces require more labour and materials.
Damaged walls may require additional preparation work.
Difficult areas increase installation complexity.
High-end finishes require greater craftsmanship.
Interior finishing continues evolving alongside modern design trends.
Contemporary architecture prioritises seamless surfaces.
Sustainable materials continue gaining popularity.
Modern compounds improve project efficiency significantly.
Custom textures and polished surfaces remain highly desirable.
Plastering generally refers to the full process of applying plaster to walls or ceilings, while skimming specifically refers to applying a thin finishing coat to create smooth surfaces ready for decoration.
Skimming can improve minor imperfections, cracks, and uneven surfaces, but severely damaged walls may require full replastering or repairs first.
Yes, skimming is commonly used to smooth and modernise ceilings, especially older textured or damaged surfaces.
Skimming plaster services continue playing an important role in creating interiors that feel cleaner, smoother, brighter, and more visually refined. From refreshing old plaster walls and modernising ceilings to improving plasterboard finishes and supporting contemporary interior design, skimming provides an efficient and highly effective solution for upgrading wall and ceiling surfaces.
Understanding the difference between skimming and plastering also helps property owners choose the right solution for their renovation or construction projects. While plastering may involve broader structural surface work, skimming focuses specifically on achieving the smooth and polished finishes that modern interiors increasingly demand.
A professionally skimmed surface offers far more than cosmetic improvement alone. It improves lighting reflection, enhances paint quality, modernises outdated spaces, increases property presentation, and helps create homes and commercial interiors that feel polished, elegant, and professionally finished for many years to come.
CcxcvsvV
Boxing training is a fantastic way to boost your fitness, develop self-defence skills, and gain mental toughness. For beginners, stepping into a boxing gym for the first time can feel intimidating.
This beginner’s guide to getting started with boxing training will provide clear steps to help you understand the essentials and begin your journey confidently.

If you want to learn more about training options and equipment, click here for more info.
Boxing is a full-body workout that delivers benefits beyond just physical fitness.
Boxing training is excellent for improving your overall physical health. It provides a combination of aerobic and anaerobic exercise, which boosts cardiovascular endurance. This means your heart and lungs get stronger with regular training.
Boxing training also offers important mental advantages.
You don’t need to spend a fortune on gear when starting. However, having the right basic equipment will protect you and make training more enjoyable.
Choosing the right gloves is important for safety and comfort.
Hand wraps protect the small bones and tendons in your hands and wrists.
A mouthguard is essential if you plan to spar or do any contact training.
Getting the basics right will help you avoid injury and get the most from training.
Your stance is your foundation in boxing.
Learning the fundamental punches will help you combine them later in training.
Practising each punch with the correct form helps you build power and accuracy.
Good defence is as important as offence in boxing.
Preparation is key to feeling comfortable and making the most of your first boxing class.
Before starting, think about what you want to get from boxing training.
Warming up prepares your body for training and reduces the risk of injury.
Your coach will guide you through the basics and ensure you learn safely.
Starting with a clear routine will help you build a strong foundation.
Staying consistent and building your skills step by step will help you improve steadily.
Avoiding common errors helps you stay safe and progress faster.
Boxing training is a rewarding activity that offers physical and mental benefits. By starting with the right equipment, learning basic techniques, and training consistently, beginners can enjoy the journey and improve steadily. Stick with it, focus on good habits, and enjoy the challenge of this great sport.
With consistent training, most beginners start seeing noticeable improvements within 3 to 6 months. Developing basic skills and conditioning happens quickly, but mastering advanced techniques and strategies takes years.
Sparring is not mandatory at the beginning. Many gyms allow beginners to focus on drills, bag work, and technique until they are ready. When you start sparring, it is done gradually and under close supervision.
Yes. Boxing is a high-intensity workout that burns calories and builds muscle, which helps with fat loss. Combined with a balanced diet, boxing training can be very effective for losing weight and improving body composition.
Minimally invasive heart surgery is a cutting-edge technique that allows heart surgeons to perform operations with smaller incisions than traditional methods.
This advancement in medical procedures offers numerous benefits, especially for patients undergoing heart surgery in Melbourne.

While these surgeries come with distinct advantages, such as shorter recovery times and reduced risks of infection, there are also risks and limitations to be considered. For more details on heart surgery options, you can find more information through this important link.
This article will explore the benefits and risks of minimally invasive heart surgery in Melbourne, helping patients make informed decisions regarding their treatment options.
Minimally invasive heart surgery is a technique that uses small incisions (usually between 2 to 5 cm) to access the heart.
Unlike traditional open-heart surgery, which requires a large incision through the chest, minimally invasive surgery allows surgeons to perform the same procedures with fewer and smaller cuts.
The surgery is often done using robotic assistance or specialised instruments, which can be introduced through these small incisions.
This method is used for various heart conditions, such as coronary artery bypass, valve replacement, or heart defect repair. It offers numerous benefits, including faster recovery times, less pain, and a lower risk of infection.
Melbourne is renowned for its healthcare facilities and advanced medical technologies. The city has world-class heart surgeons and hospitals, making it an ideal location for those seeking minimally invasive heart surgery.
The availability of highly skilled professionals, combined with state-of-the-art medical equipment, ensures that patients receive the best possible care and treatment options.
One of the main advantages of minimally invasive heart surgery is the shorter recovery time compared to traditional open-heart surgery. Since the incisions are smaller, there is less trauma to the body, which leads to quicker healing.
Most patients can leave the hospital in just a few days, whereas traditional surgeries may require a hospital stay of 7 to 10 days.
With smaller incisions, the risk of infection is significantly lower. Larger incisions, as in traditional open-heart surgery, expose the body to more bacteria and increase the likelihood of post-surgical infections.
In contrast, minimally invasive surgery’s smaller incisions are less prone to infection, reducing the need for antibiotics and further medical interventions.
Minimally invasive heart surgery involves smaller incisions, which results in less tissue damage. As a result, patients experience less pain during recovery. In addition, the smaller incisions lead to less visible scarring, which is often a concern for patients undergoing traditional heart surgery.
Because of the reduced recovery time and less post-surgery pain, patients can return to their normal activities much faster than those who undergo traditional open-heart surgery.
Most patients can resume light activities, such as walking, within a few weeks, and more strenuous activities can be resumed in about 6 to 8 weeks.
Minimally invasive procedures use smaller incisions, which means there is less visible scarring. For many patients, this cosmetic benefit is a significant factor in choosing this type of surgery.
The small incisions, usually made along the chest or under the arm, leave less noticeable scars compared to the large, long scars left from traditional heart surgery.
While minimally invasive heart surgery offers numerous benefits, it is essential to consider the potential risks involved.
One of the drawbacks of minimally invasive surgery is that the smaller incisions may limit the surgeon’s access to the heart.
This can make it challenging to perform complex procedures. In some cases, the surgeon may have to switch to traditional open-heart surgery if they are unable to complete the operation with the minimally invasive approach.
As with any surgery, there are risks associated with anesthesia. Although the risks are generally low, some patients may experience complications such as allergic reactions, breathing difficulties, or heart problems related to the anesthesia.
For patients with pre-existing conditions, these risks can be more pronounced.
Minimally invasive heart surgery is not suitable for everyone. Patients with complex heart conditions or those who have had previous heart surgeries may not be candidates for this type of surgery.
The surgeon will assess the patient’s medical history and condition to determine whether they are eligible for minimally invasive surgery.
While minimally invasive surgeries typically result in shorter recovery times, the actual surgery may take longer than traditional procedures.
This is because the surgeon must work within a smaller space, which can make the procedure more time-consuming. The use of robotic assistance can also increase the procedure time.
In some cases, minimally invasive techniques may not provide as thorough a result as traditional surgery.
While it is effective for many conditions, it might not be the best option for complex heart problems. Some patients may require additional treatments or even a second surgery to address underlying issues.
Minimally invasive heart surgery generally involves the following steps:
In Melbourne, many hospitals use robotic-assisted surgery for heart procedures. Robotic systems allow surgeons to make precise movements, improving accuracy and reducing the risk of errors.
The robotic arms provide enhanced dexterity and a clear view of the heart, allowing the surgeon to perform delicate procedures with minimal disruption to surrounding tissues.
The cost of minimally invasive heart surgery in Melbourne can vary depending on factors such as the type of procedure, the complexity of the case, and the healthcare facility.
However, it is generally more expensive than traditional open-heart surgery due to the advanced equipment and technology used. Patients are advised to consult with their surgeon and hospital to obtain an accurate estimate of the costs involved.
For those with private health insurance, the out-of-pocket expenses may be reduced, but it’s essential to confirm coverage before proceeding with the surgery. Public hospitals may also offer minimally invasive options, though waiting times can vary.
Minimally invasive heart surgery in Melbourne offers several advantages, including shorter recovery times, reduced risks of infection, and improved cosmetic outcomes.
However, it is important for patients to understand the potential risks, such as limited surgical access and longer procedure times. By consulting with experienced surgeons, patients can make informed decisions about whether this approach is suitable for their specific condition.
As the field of minimally invasive surgery continues to evolve, it remains a promising option for many heart patients seeking effective and less invasive treatment options.
Eligibility for minimally invasive heart surgery depends on various factors, including the type and severity of the heart condition, the patient’s overall health, and their medical history. Your surgeon will assess your condition to determine if you are a suitable candidate for this type of surgery.
Recovery time for minimally invasive heart surgery is typically shorter than traditional open-heart surgery.
Most patients can leave the hospital within a few days and resume light activities within a week or two. Full recovery, including a return to strenuous activities, may take about 6 to 8 weeks.
The main risks of minimally invasive heart surgery include limited access to the heart, potential complications from anesthesia, the possibility of incomplete treatment, and the longer procedure time. Additionally, some patients may not be suitable candidates for this type of surgery.
Weddings are an extraordinary occasion that blends love, tradition, and celebration. From the grand entrance of the bride to the final dance of the evening, each detail plays a vital role in creating the perfect atmosphere. One of the most powerful yet subtle elements that shape a wedding’s ambience is lighting and decor.

These elements can transform a venue, influencing how guests perceive and experience the event. In this article, we examine the role of lighting and decor in setting the mood during wedding celebrations.
Check these guys out on our website to help you create the perfect atmosphere for your special day.
Lighting is one of the most effective tools in setting the mood for a wedding celebration. It can evoke emotions, highlight specific areas, and create an atmosphere that aligns with the couple’s vision for their special day. Whether it’s soft, romantic lighting or bright, energetic colours, lighting plays an essential role in transforming a venue.
Soft, warm lighting is often used to create an intimate and romantic atmosphere. This type of lighting softens the space, making it feel more inviting and personal. It helps to set the tone for a wedding celebration, particularly during the ceremony or dinner portion of the evening.
These lighting choices enable couples to create a serene and romantic atmosphere that feels warm and welcoming, making guests feel at ease.
On the other hand, bright and vibrant lighting can energise the wedding atmosphere, particularly when it’s time for the reception and dancing. The choice of colour can significantly influence the mood and energy of the celebration.
When done correctly, vibrant lighting can ensure that the wedding celebration feels exciting, dynamic, and fun, especially when it’s time to let loose and celebrate.
Ambient lighting is the background lighting that fills the venue with an even level of light, allowing guests to move around comfortably without feeling either too bright or too dim. This lighting is crucial for setting the mood from the moment guests arrive until the event concludes.
By using ambient lighting in combination with other types of lighting, couples can achieve the perfect mood for their celebration, whether it’s tranquil and calming or full of energy and excitement.
Decor has a significant impact on the overall mood of a wedding. It helps to tell the story of the couple’s personalities and preferences while enhancing the theme of the event. From floral arrangements to table settings, every decor element plays a role in shaping the atmosphere.
Flowers are one of the most common decor elements used to set the mood at weddings. The type, colour, and placement of flowers can transform the entire space, making it feel more intimate, vibrant, or elegant.
In addition to their visual appeal, flowers also bring a natural fragrance that contributes to the sensory experience of the wedding, adding an extra layer of mood-setting.
The table settings at a wedding play a vital role in both the decor and the mood of the event. Each piece, from the tablecloths to the cutlery, should complement the overall theme and contribute to creating the desired atmosphere.
The way the tables are arranged and decorated can also influence the social dynamics of the event. Long, communal tables foster a sense of togetherness, while round tables allow for a more traditional seating arrangement that encourages conversation.
In addition to the visual elements of decor, the textures and fabrics used throughout the venue contribute to the overall mood. The right textures can create a feeling of luxury, warmth, or simplicity, depending on the couple’s vision for their celebration.
Each fabric and texture tells a story, helping to evoke the right emotions and setting the mood for a memorable wedding day.
When lighting and decor are combined thoughtfully, they create a cohesive atmosphere that enhances the wedding experience. The key is to ensure that both elements work in harmony with one another, creating a seamless environment where guests can relax, celebrate, and enjoy the festivities.
It’s essential that the lighting matches the theme of the wedding decor. For example, a rustic wedding with wooden tables and wildflower bouquets may benefit from warm, soft lighting and candles to enhance the natural, earthy vibe. Conversely, a modern wedding with sleek, metallic decor may pair well with bright, bold lighting and minimalistic design.
Specific moments, such as the couple’s first dance or the cutting of the cake, deserve special attention. These moments can be emphasised with dramatic lighting to ensure they are captured beautifully and set the right tone for everyone involved.
By strategically using lighting to highlight important moments, couples can ensure their wedding celebrations are memorable and impactful.
Lighting and decor are essential in setting the mood for a wedding celebration. The right combination can transform a venue, influence how guests perceive it, and create a truly memorable experience.
From intimate candlelight to vibrant coloured lighting, each element plays a significant role in shaping the overall atmosphere. When paired with thoughtfully chosen decor and lighting, the wedding experience can be elevated, ensuring that the couple’s special day is nothing short of magical.
Lighting is one of the most impactful elements in setting the mood of a wedding. Soft, warm lighting creates an intimate, romantic atmosphere, while brighter, vibrant lighting energises the space, especially during the reception. By adjusting the intensity and colour of the lighting, you can control the emotional tone of the event, making it feel either calm and serene or lively and exciting.
Popular decor ideas include incorporating floral arrangements, textured fabrics, and thoughtfully chosen table settings to reflect the couple’s theme and desired ambience. Soft pastels and delicate flowers create a romantic vibe, while bold colours and modern decor can energise the space. Custom elements, like personalised signage or unique centrepieces, also help set the tone for the wedding day.
Combining lighting and decor thoughtfully can create a harmonious atmosphere. For example, the lighting can complement the decor’s colour palette and enhance the overall theme. By using ambient lighting to fill the space and accent lighting to highlight specific moments, such as the couple’s first dance, you can ensure both elements work together to create a memorable experience.
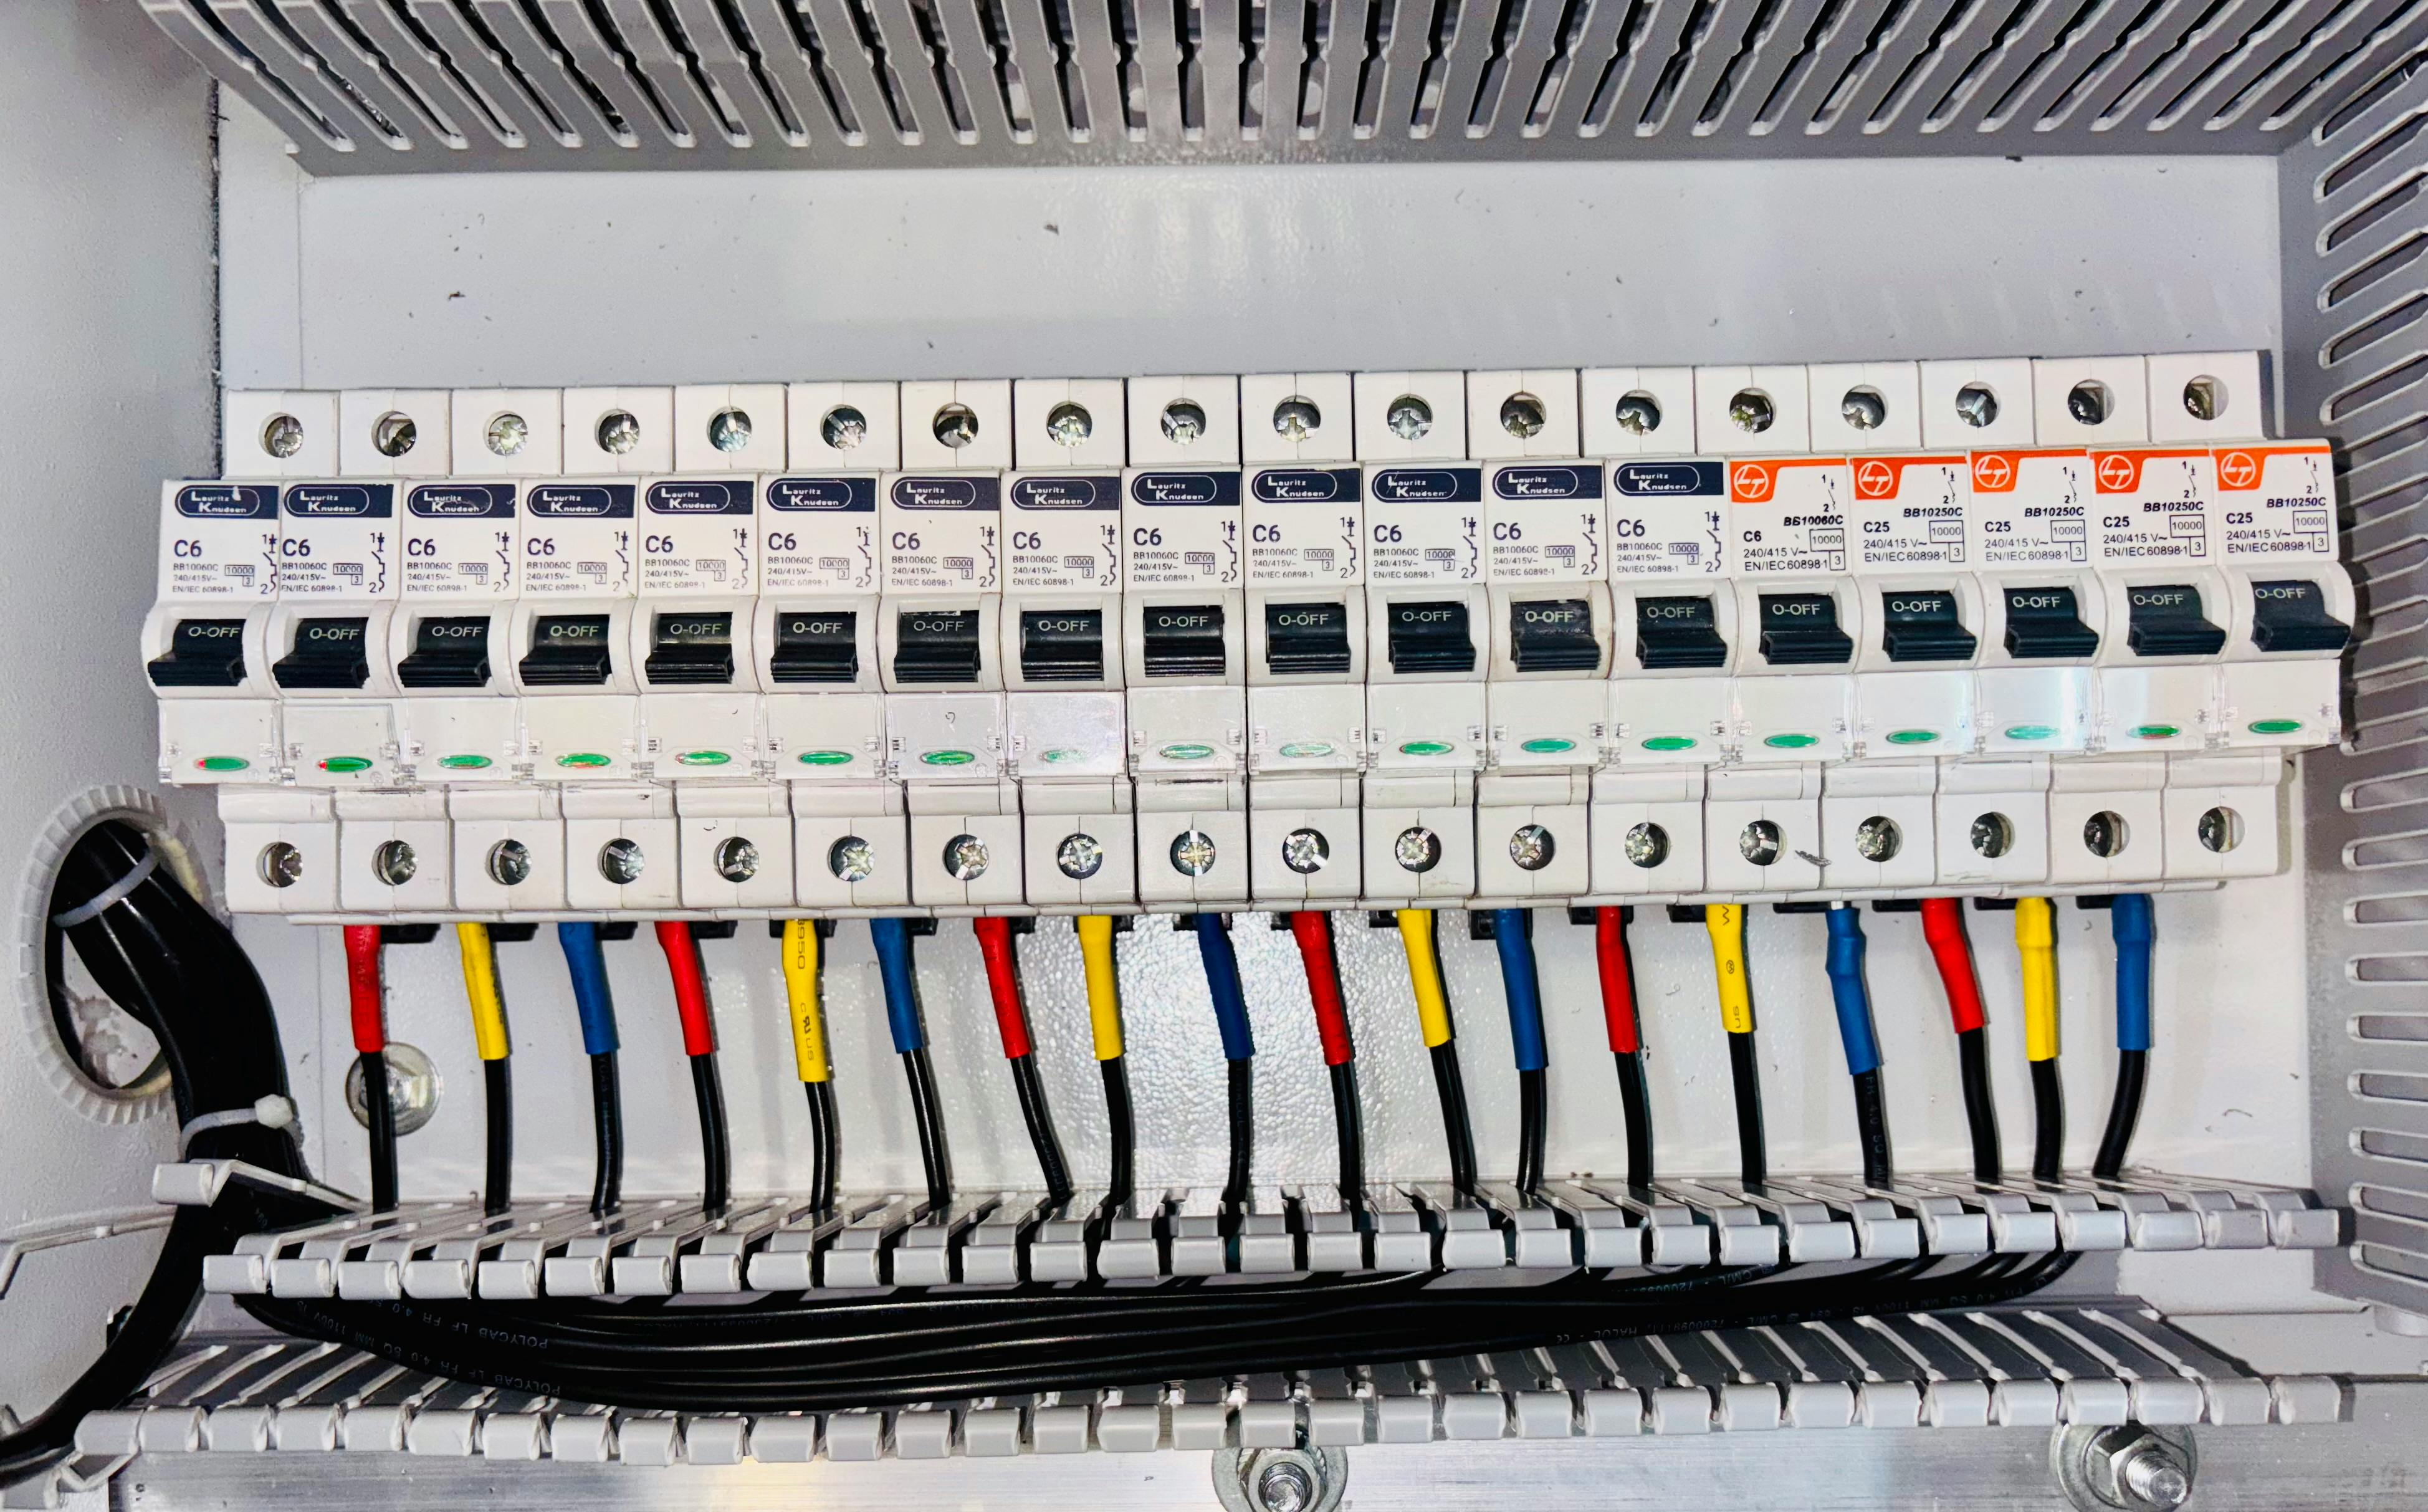
When planning a commercial electrical fit-out, safety, efficiency, and compliance are critical components that should never be overlooked. A well-designed electrical system not only ensures the smooth operation of your business but also safeguards the well-being of your employees, customers, and assets.
In this guide, we will explore essential steps for ensuring a safe and efficient commercial electrical fit-out.
For expert assistance, don’t hesitate to contact a trusted Melbourne electrician through our website.
Every commercial building in Australia is subject to strict electrical safety standards and codes. The National Construction Code (NCC) and the Australian Standards (AS/NZS) are two key references that guide the installation of electrical systems.
Ensuring compliance with these regulations is vital to avoid penalties and safeguard the property and its occupants.
For a commercial electrical fit-out, it’s essential to engage qualified electrical contractors who are licensed and experienced in handling complex installations. Unqualified or inexperienced electricians may not adhere to safety standards, which can potentially lead to hazards or failures in the electrical system.
Before commencing the electrical fit-out, a comprehensive risk assessment should be conducted. This helps identify potential electrical hazards and ensures that appropriate safety measures are implemented. Implementing safety protocols during installation and testing ensures that all electrical systems are safe to use.
A well-designed electrical system is crucial for the efficiency of your commercial space. A properly planned design should consider current and future power needs, energy efficiency, and ease of maintenance.
The electrical system must meet the specific operational needs of your business, whether it’s an office, retail space, or warehouse.
Energy efficiency is a key factor in reducing long-term operational costs. Installing energy-efficient systems not only reduces electricity bills but also minimises your business’s carbon footprint. Some considerations for improving energy efficiency include:
Accurate load calculations are essential for ensuring that the electrical system can handle the demands of your business. These calculations determine the number of circuits, switchboards, and transformers required to power your building efficiently.
A poorly designed system may result in overloads, overheating, and, in worst cases, electrical fires. By conducting proper load calculations, you ensure the electrical system is capable of safely supporting your commercial space.
Once the design phase is complete, the installation process can begin. The installation must be carried out by licensed electricians who follow all relevant safety codes and regulations. Poor installation practices can lead to system malfunctions, energy inefficiency, and even safety hazards.
To ensure the longevity and reliability of your electrical system, it is essential to choose high-quality components. High-quality cables, circuit breakers, transformers, and switches reduce the risk of failure, improving the overall safety and efficiency of the system.
Cutting corners on components to save money can result in costly repairs and safety issues in the future.
After installation, the system should undergo rigorous testing to confirm its functionality. This includes verifying that the wiring is secure, checking that circuit breakers work as intended, and testing for any potential faults in the system. Electrical systems must be tested for performance, safety, and compliance with regulatory standards before they are handed over for use.
Even after the electrical system is installed and operational, ongoing maintenance is crucial for ensuring its continued safe and efficient operation. Regular inspections, timely repairs, and system upgrades can prevent potential issues from escalating into more significant, costly problems.
Routine inspections help identify any signs of wear and tear in the system, such as frayed wires or faulty circuit breakers. Electrical components, such as emergency lighting and fire alarms, should be tested periodically to ensure they function correctly in the event of an emergency.
As your business grows or adopts new technology, your electrical system may require an upgrade. Adding new equipment or changing operational processes could require additional power sources, new circuits, or higher-capacity switchboards.
Regularly updating the electrical system ensures that it can meet evolving demands and remain compliant with safety standards.
In conclusion, ensuring a safe and efficient commercial electrical fit-out is crucial for the smooth operation of your business. By prioritising compliance, hiring qualified contractors, and following best practices for design, installation, and maintenance, you can create an electrical system that is not only safe but also cost-effective and future-proof.
Whether you’re renovating an existing space or setting up a new commercial building, it’s vital to approach your electrical fit-out with careful planning and attention to detail. A well-executed electrical system is a long-term investment in the success of your business, providing safety, efficiency, and peace of mind.
During a commercial electrical fit-out, safety should be the top priority. Ensuring compliance with Australian safety standards, such as the AS/NZS 3000, is essential. Additionally, proper grounding, the installation of circuit breakers, and regular inspections are key to preventing electrical hazards. Hiring licensed and experienced electricians ensures that the work is done safely and by code.
It’s recommended that commercial electrical systems be inspected at least once every five years. However, more frequent checks may be necessary if the building experiences high usage or if significant electrical equipment is added. Regular inspections help identify any potential issues early, reducing the risk of breakdowns or hazards.
Yes, an energy-efficient electrical fit-out can significantly reduce operational costs. By using energy-efficient lighting, equipment, and HVAC systems, businesses can lower their electricity bills. Additionally, implementing renewable energy sources, such as solar panels, can provide long-term savings while also benefiting the environment.
As we age, our facial structure changes. The skin loses its natural volume and elasticity, resulting in wrinkles, sagging, and a less youthful appearance. Dermal fillers have become one of the most popular non-surgical treatments for restoring lost volume and enhancing the natural contours of the face. But how do they work?

This article provides a comprehensive overview of how dermal fillers can restore volume and youthful contours to your face, explaining their effects and benefits.
This is a great post to read to gain a better understanding of how dermal fillers can benefit you.
Dermal fillers are injectable treatments designed to add volume, smooth wrinkles, and enhance facial contours. They consist of various substances, including hyaluronic acid, calcium hydroxyapatite, and poly-L-lactic acid, all of which are safe, biocompatible, and naturally occurring in the body.
These substances are injected into the skin to temporarily plump up areas that have lost volume, filling out wrinkles, fine lines, and hollow areas.
As we age, the skin loses volume in several key areas of the face, particularly in the cheeks, under-eye region, temples, and jawline. This loss of volume occurs due to the gradual reduction in fat, collagen, and elastin. As a result, the face may appear sunken or hollow, and the skin begins to sag.
Dermal fillers work by replenishing the lost volume, creating a more youthful, plump, and fuller appearance. For instance:
By targeting these areas, dermal fillers help to create more natural and youthful facial proportions.
As volume decreases, wrinkles and folds become more pronounced. Dermal fillers can help to smooth out these wrinkles and restore youthful contours by filling in the areas that have become creased or sagging. Some common areas treated with dermal fillers include:
By filling in these wrinkles and folds, dermal fillers not only restore volume but also create a smoother and more refined skin texture.
While dermal fillers provide immediate volume restoration, some types of fillers also stimulate the production of collagen in the skin. Collagen is a protein that provides structure, strength, and elasticity to the skin. As we age, collagen production slows down, contributing to the formation of wrinkles and sagging skin.
Specific dermal fillers, like those made from poly-L-lactic acid (e.g., Sculptra), stimulate the body’s natural collagen production over time. This helps to improve the skin’s structure, firmness, and elasticity. As the body produces more collagen, the skin becomes firmer and more youthful-looking, providing long-term benefits that extend beyond the immediate results of the filler.
This ability to stimulate collagen production makes dermal fillers a more sustainable option for facial rejuvenation, as the skin gradually improves in texture and tone over time.
The natural volume of the face is crucial for maintaining balanced facial proportions. As we age, volume loss in certain areas can throw off these proportions, making the face appear less balanced and more tired.
Dermal fillers can restore these proportions by adding volume where it’s needed most. For example, adding volume to the cheeks, temples, or jawline can enhance the face’s symmetry, making it appear more youthful and aesthetically pleasing.
This restoration of facial balance improves overall facial harmony and helps maintain youthful contours. By restoring proportion and symmetry, dermal fillers can create a natural, youthful appearance without the need for invasive surgery.
Dermal fillers are an effective and non-invasive solution for restoring facial volume and enhancing youthful contours. By targeting areas that have lost volume, smoothing out wrinkles, and stimulating collagen production, dermal fillers provide a natural, refreshed, and rejuvenated appearance.
With various types of fillers available to address specific needs, dermal fillers offer a customised approach to facial rejuvenation, helping individuals achieve a more youthful look without the need for surgery.
Whether you’re looking to restore volume to the cheeks, smooth out nasolabial folds, or define your jawline, dermal fillers are a safe and convenient option that provides immediate and long-lasting results.
The results of dermal fillers typically last between 6 months to 2 years, depending on the type of filler used and the area treated. Hyaluronic acid fillers typically last between 6 to 12 months, while fillers such as poly-L-lactic acid or calcium hydroxylapatite can provide longer-lasting results. However, individual factors such as age, lifestyle, and skin type may affect the longevity of the results.
Yes, dermal fillers are generally safe when administered by a qualified practitioner. The materials used in most dermal fillers, such as hyaluronic acid, are biocompatible and naturally found in the body. However, as with any cosmetic procedure, there are potential risks, including bruising, swelling, or allergic reactions. It’s essential to consult with a skilled professional to minimise any risks.
The injection process for dermal fillers is typically not painful, though it may cause mild discomfort. Many fillers contain lidocaine, a local anaesthetic, to help minimise pain during the treatment. For added comfort, a topical numbing cream is often applied to the treatment area before the injections, ensuring that the procedure is as painless as possible.
Boxing has gained popularity not just as a physical activity but also as a powerful mental tool. For many, stepping into the ring or taking part in a structured training session does more than strengthen muscles—it sharpens the mind. This sport demands mental agility, emotional control, and unwavering concentration.
Through consistent training, boxing enhances focus, reduces mental clutter, and helps individuals navigate daily challenges with improved clarity. In the sections that follow, we explore how boxing influences mental performance and why it’s increasingly being recognised for its cognitive and psychological benefits.

Boxing is widely recognised for its physical benefits, but its impact on mental focus and clarity is just as significant. Engaging in boxing drills and routines activates mental faculties, improves concentration, and helps to manage stress.
Boxing sessions require complete mental engagement. When an individual is in the ring or training, the mind must be fully present. The fast-paced nature of the sport demands:
This intense level of concentration trains the brain to block out distractions and maintain focus, even in high-pressure situations. Practising these skills frequently strengthens the mind’s capacity to stay on task and enhances attentiveness in daily situations.
Boxing sharpens quick-thinking skills. Each punch thrown or dodged is the result of fast decisions. Regular boxing training improves reaction time and enhances the ability to make split-second choices.
Improved decision-making is beneficial outside the ring, especially in high-pressure situations where clear thinking is essential. Athletes often report feeling more mentally agile and able to make faster, more effective decisions in their personal and professional lives.
Boxing teaches self-control and structure. The sport follows a strict training schedule that helps build a disciplined mindset. This structure promotes:
The mental discipline developed through boxing often translates into other areas such as work, academics, or daily routines. Sticking to a regimen helps build habits that improve efficiency and goal-setting.
Boxing provides a productive outlet for stress. High-intensity workouts trigger the release of endorphins, chemicals in the brain that enhance mood. The rhythmic and repetitive nature of boxing movements also helps:
This stress relief contributes to greater mental clarity. Reducing stress levels helps clear the mind, making it easier to focus on tasks without emotional interference.
Every challenge in boxing—whether sparring or learning a new technique—requires persistence. Overcoming these obstacles fosters resilience. With each victory, no matter how small, confidence builds.
Increased confidence reduces mental clutter and encourages a clearer, more assertive mindset. The ability to remain confident in the face of adversity supports mental strength in various aspects of life.
Boxing routines involve hand-eye coordination, balance, and memory. Coordinating footwork with punches requires the brain and body to work together efficiently. This stimulates cognitive processes that contribute to:
These skills are instrumental in multitasking and problem-solving. Mental tasks become less overwhelming as brain functions operate with increased synchronicity.
Boxers must stay in the moment. A lapse in attention can result in missed opportunities or getting hit. This need for presence encourages mindfulness—a mental state of being fully aware and focused on the present moment.
Mindfulness improves attention span and reduces mental distractions. Regular exposure to this focused state can cultivate a calmer, more centred mind throughout the day.
Training in boxing often requires a commitment to a regular schedule. Consistent routines benefit mental clarity by:
When the mind knows what to expect, it functions more efficiently. Regular routines offer a dependable framework that reduces uncertainty and mental overload.
Boxing teaches individuals how to manage their emotions. In high-stress sparring sessions, maintaining calmness and focus is crucial. Through regular practice, boxers learn to:
Better emotional control leads to clearer thinking and improved focus. Emotional stability helps maintain mental balance, even in challenging circumstances.
Group training or boxing classes foster camaraderie and accountability. These social interactions improve emotional health. Having a support network:
Strong emotional support contributes to overall mental clarity. Shared goals and mutual encouragement within a group environment help individuals stay motivated and mentally grounded.
Research shows that physical activity like boxing enhances neuroplasticity—the brain’s ability to form and reorganise synaptic connections. This leads to:
Improved neuroplasticity boosts cognitive performance. The ability to learn, retain, and apply information more effectively becomes a long-term benefit of boxing training.
Boxing gives individuals a reason to show up, work hard, and improve. This sense of purpose improves motivation and mental direction. Purpose-driven individuals:
Having clear goals helps streamline mental processes and avoid distractions. When people know why they train, they tend to develop sharper, more determined mindsets.
The repetitive, focused actions in boxing can help reset mental states. Unlike chaotic environments, boxing training provides a structured, goal-oriented activity that helps recharge mental energy.
Combatting mental fatigue allows for more sustained focus throughout the day. Participants often report feeling more alert and less mentally drained after sessions.
Regular boxing workouts help regulate sleep patterns. Quality sleep enhances mental performance by:
A well-rested mind is more precise, more focused, and better equipped for decision-making. Restorative sleep supports every cognitive function necessary for maintaining mental clarity and focus.
Boxing encourages internal reflection. Athletes often assess their mental and physical performance after each session. This promotes:
Self-awareness supports more transparent thought processes and personal growth. Recognising one’s habits, reactions, and patterns is essential for long-term mental improvement.
Boxing is more than a sport—it’s a tool for mental enhancement. Through focused training, stress management, and cognitive stimulation, it significantly improves focus and mental clarity. Individuals seeking sharper thinking, better emotional control, and improved resilience can benefit immensely from incorporating boxing into their lifestyle.
Whether you’re managing work deadlines, academic responsibilities, or personal challenges, the mental skills honed through boxing can provide clarity, resilience, and a sense of purpose. Boxing trains not just the body but also sharpens the mind for daily success.
Training two to three times a week is a good starting point for experiencing mental benefits. Consistent practice builds focus, discipline, and stress relief over time. As your skills and comfort grow, more frequent sessions can further enhance mental clarity.
Yes, even beginners can notice improvements in mental focus and clarity from the start. The concentration required for basic drills and footwork engages the brain and reduces distractions. With regular training, these mental benefits become more pronounced.
Boxing is an excellent outlet for releasing stress related to work. Physical activity helps discharge tension, while the focus required during sessions distracts from workplace worries. Many people find they return to work more focused and calm after training.
The first few years of a child’s life are critical for their development, and nutrition plays a central role in this process. From physical growth to cognitive and emotional development, proper nutrition during early childhood helps establish a foundation for a healthy future.

In this article, we will examine the significance of nutrition in early childhood development, highlighting its influence on various aspects of a child’s growth.
Visit our site for additional resources and support.
Nutrition provides the essential nutrients that children need to develop physically and mentally. These early years are marked by rapid growth, and the right balance of vitamins, minerals, and other nutrients is crucial to support these developmental stages. A lack of proper nutrition can result in developmental delays and long-term health issues.
Proper nutrition is essential for physical growth during a child’s early years. The early stages of development are the most critical in ensuring that children reach their full potential in terms of height, weight, and overall health.
Ensuring that a child receives a balanced diet rich in these nutrients promotes physical well-being and supports the formation of a healthy body.
In addition to physical growth, nutrition has a direct impact on cognitive development. Early brain development is highly sensitive to the quality and quantity of nutrients consumed. Nutrients such as omega-3 fatty acids, iodine, and zinc are crucial for maintaining brain health and optimal function.
Lack of these nutrients can result in issues such as learning difficulties and decreased cognitive abilities.
The link between nutrition and emotional development is often overlooked. However, what children eat can influence their mood, behaviour, and ability to interact with others. Poor nutrition can lead to irritability, difficulty concentrating, and emotional regulation issues.
Healthy eating habits from an early age contribute to emotional resilience and healthy social relationships.
The first 1000 days of a child’s life, from conception to the child’s second birthday, is a particularly sensitive period for nutrition. During this time, rapid growth and brain development occur, making it a crucial window to ensure children receive the right nutrients.
Breast milk is often regarded as the ideal source of nutrition for infants, providing the necessary nutrients in the right proportions. It is rich in essential fatty acids, vitamins, and minerals that support brain and physical development.
Health experts recommend exclusive breastfeeding for the first six months, as it provides all the essential nutrients that a baby needs for growth and development.
As a child approaches six months of age, solid foods should be gradually introduced to complement breast milk or formula. At this stage, iron-rich foods such as pureed meats, beans, and fortified cereals are particularly important to prevent iron deficiency, which can lead to anaemia.
Introducing a variety of foods helps ensure that children receive the broad spectrum of nutrients required for growth and development.
While nutrition is essential for a child’s development, deficiencies in key nutrients can have significant consequences on their health. Below are some of the most common nutritional deficiencies that can affect early childhood development:
Iron deficiency is one of the most common nutrient deficiencies in children, particularly in toddlers and preschoolers. Iron is necessary for the production of haemoglobin, which carries oxygen in the blood. A lack of iron can lead to anaemia, which can cause fatigue, weakness, and developmental delays.
Vitamin D plays a crucial role in maintaining bone health by facilitating calcium absorption. It is also crucial for the development of a healthy immune system.
Vitamin D can be obtained through sunlight exposure and fortified foods; however, children need to receive adequate amounts to ensure proper bone and immune health.
Calcium is important for the development of strong bones and teeth, especially during the early years of life when bone growth is most rapid. A lack of calcium can lead to poor bone mineralisation, resulting in an increased risk of fractures and bone deformities.
Ensuring that children consume enough calcium is essential for promoting healthy bone development.
It is never too early to start promoting healthy eating habits in children. Teaching children the importance of a balanced diet and encouraging them to try new foods can have a lasting impact on their health. Below are some strategies for fostering good nutrition habits in early childhood:
Providing a variety of foods and making mealtimes a regular part of the daily routine can help children develop healthy eating habits. This includes offering a mix of fruits, vegetables, proteins, and whole grains to ensure they receive all the nutrients they need.
Children learn by observing the behaviour of their parents and caregivers. Being a positive role model by consuming a balanced diet and showing enthusiasm for healthy foods can encourage children to adopt similar habits.
Water is essential for maintaining proper hydration, which in turn supports overall health and development. Children should be encouraged to drink water throughout the day, especially when they are physically active.
The early years of a child’s life are foundational for their long-term health and development. Proper nutrition is one of the most influential factors in shaping a child’s physical, cognitive, and emotional growth. By providing a balanced diet that includes all the necessary nutrients, parents and caregivers can ensure children have the best possible start in life.
From supporting growth and brain development to promoting emotional stability, nutrition plays a vital role in a child’s overall well-being. Ensuring that children receive adequate amounts of key nutrients during this critical period can help prevent deficiencies and support lifelong health. Parents and caregivers play a key role in setting the foundation for healthy eating habits, which will benefit children throughout their lives.
To ensure your child receives adequate nutrition, focus on providing a balanced diet that includes a variety of fruits, vegetables, proteins, whole grains, and dairy products. It’s also important to introduce iron-rich foods and healthy fats and provide sufficient hydration. Regularly offering a mix of these food groups can help meet your child’s growing nutritional needs.
Signs of nutritional deficiencies in children may include fatigue, irritability, difficulty concentrating, pale skin, or developmental delays. If your child is exhibiting any of these symptoms, it’s essential to consult a healthcare professional to address any potential nutritional deficiencies.
Breastfeeding provides the ideal nutrition for infants during the first six months of life, offering essential nutrients like proteins, fats, and antibodies. However, as babies grow, introducing complementary foods around six months is necessary to ensure they get enough iron and other key nutrients to support their development.
Designing a pharmacy that is both welcoming for customers and efficient for staff is crucial for success. A well-thought-out pharmacy fit-out enhances the customer experience and improves operational workflow.
In this article, we provide straightforward guidance on creating a pharmacy fit-out that combines functionality with a welcoming atmosphere, ensuring both customers and staff can move smoothly through the space.

See this website for assistance with your pharmacy design needs.
Creating a welcoming environment is the first step in designing a pharmacy. Customers need to feel comfortable and confident in the space, whether they are picking up a prescription or asking for advice. A well-designed pharmacy should feel calm, clean, and easy to navigate.
It’s essential that customers can quickly find what they need, especially in larger pharmacies. A clear signage system helps guide customers throughout the store, making it easier for them to access the products and services they need.
An efficient pharmacy layout is crucial for minimising wait times and enabling staff to serve customers promptly. Workflow efficiency can be achieved by organising the space strategically, ensuring that every area serves its purpose.
When designing a pharmacy, consider the daily activities that occur within it and ensure that the layout supports these activities effectively. For example, the dispensing area should be easily accessible to staff, and prescription medications should be stored in a manner that allows for quick and easy retrieval.
Maximising the use of available space is vital in creating an efficient pharmacy. This can involve using flexible shelving, adjustable fixtures, and keeping the flow of traffic in mind to ensure a smooth workflow. When space is limited, opt for modular fixtures that can be easily adapted as the pharmacy’s needs evolve.
It is crucial to make the pharmacy accessible for all customers, including those with disabilities. A well-designed pharmacy fit-out should be easy to navigate for everyone, ensuring a smooth and efficient shopping experience.
Ensure your pharmacy layout accommodates people with various mobility needs. This includes wide aisles, low shelves, and clear signage.
A pharmacy must comply with local regulations related to safety and accessibility. Ensure that emergency exits are clearly marked and easily accessible. Fire safety is paramount; therefore, ensure your design meets all relevant safety requirements.
Lighting plays a vital role in creating a welcoming atmosphere while also ensuring visibility and functionality. The right lighting design can make the space feel inviting, calm, and conducive to good customer service.
In today’s world, technology can significantly improve both the customer experience and workflow efficiency. Integrating technology into your pharmacy fit-out can help reduce human error, streamline inventory management, and provide customers with more interactive experiences.
Sustainability is becoming more critical in the design of any commercial space. By incorporating sustainable practices into your pharmacy fit-out, you can not only reduce environmental impact but also save on operational costs over time.
Choosing the right materials for your pharmacy fit-out is crucial for durability, ease of maintenance, and aesthetics. The materials used in your design should be durable and easy to clean, given the high traffic in pharmacies.
While pharmacies are places of business, they should also make customers feel comfortable and at ease. A calm and welcoming atmosphere can help ease any anxiety or discomfort customers may experience when visiting a pharmacy, especially for those seeking advice on sensitive matters.
Creating a welcoming and efficient pharmacy fit-out requires careful planning and attention to detail. By focusing on a customer-centric layout, ensuring workflow efficiency, incorporating the right technology, and designing for accessibility, you can create a space that serves both customers and staff well.
Additionally, sustainable design practices, adequate lighting, and material choices contribute to long-term operational efficiency.
A well-designed pharmacy not only enhances customer experience but also supports the staff in providing excellent service. By keeping the principles outlined above in mind, you can create a space that is both functional and comfortable and conducive to a positive pharmacy experience.
When designing a pharmacy fit-out, it’s essential to focus on customer experience, efficient workflow, and accessibility. A welcoming atmosphere can be created with clear signage, comfortable seating, and an organised layout.
Ensuring that staff have an efficient workflow with designated areas for prescription filling and over-the-counter products is also essential. Additionally, considering sustainability and incorporating technology can improve the pharmacy’s long-term functionality and customer satisfaction.
Improving accessibility in a pharmacy fit-out involves ensuring the space is easy to navigate for everyone, including individuals with disabilities. This can be achieved by ensuring wide aisles, accessible counters, and clear signage. Additionally, incorporating non-slip flooring and providing seating in waiting areas can further enhance comfort and safety for all customers.
Technology can significantly enhance a pharmacy’s efficiency by integrating automated dispensing systems, which reduce errors and speed up prescription fulfilment. Digital signage can help with customer engagement and wayfinding, while modern point-of-sale (POS) systems streamline transactions and inventory management.
By implementing these technological solutions, pharmacies can provide a more seamless experience for both customers and staff.


